The Irresistible Charm of Oreo Frosting: Why It's a Must-Try
In the vast world of dessert toppings, few can boast the universal appeal and sheer decadence of Oreo frosting. This isn't just any ordinary buttercream; it's a celebration of two beloved classics coming together: the rich, velvety smoothness of traditional frosting and the iconic, deeply satisfying crunch and flavor of Oreo cookies. Whether you're a seasoned baker or just starting your culinary journey, mastering this creamy delight is a gateway to elevating virtually any sweet treat.
The magic of Oreo frosting lies in its unparalleled ability to transform. Imagine a simple chocolate cake suddenly imbued with a nostalgic, cookies-and-cream twist. Picture humble vanilla cupcakes crowned with a cloud of fluffy, speckle-dotted deliciousness. From elegant layer cakes destined for birthday bashes to a spontaneous treat for a quiet evening in, this frosting promises an experience that's both comforting and gourmet. Its distinctive flavor profile – a perfect balance of sweetness, subtle cocoa, and that unmistakable Oreo essence – makes it not just a topping, but a star in its own right. It's surprisingly simple to create, relying on just a few core ingredients, yet delivers an impact that far exceeds its modest origins. The versatility is truly endless, making it a staple for anyone looking to add a touch of impressive flair to their baking.
The Core Ingredients for Your Perfect Oreo Frosting
Crafting sublime Oreo frosting doesn't require an extensive pantry. In fact, its beauty lies in the simplicity of its components, each playing a crucial role in achieving that coveted creamy, dreamy texture and unforgettable flavor. Here's a closer look at the essential building blocks:
Unsalted Butter: The Creamy Foundation
At the heart of any great buttercream lies butter. For Oreo frosting, unsalted butter is highly recommended. Using unsalted butter gives you complete control over the overall saltiness of your frosting, allowing the other flavors to shine without competition. Crucially, your butter must be at room temperature. This isn't just a suggestion; it's vital for a smooth, homogenous frosting. Butter that's too cold will result in a lumpy, difficult-to-mix texture, while butter that's too soft (bordering on melted) can make your frosting greasy and unstable. If you only have salted butter, you can still use it, but be mindful of potentially reducing any added salt in the recipe to avoid an overly savory finish.
Powdered Sugar: Sweetness and Structure
Also known as confectioners' sugar or icing sugar, powdered sugar is indispensable for achieving the fine, silky texture of Oreo frosting. Unlike granulated sugar, its superfine particles dissolve instantly into the butter, preventing grittiness and contributing to the frosting's structure and stability. A pro tip for the smoothest possible frosting is to *sift your powdered sugar* before adding it. This removes any lumps, ensuring an impeccably smooth finish. If you find yourself without powdered sugar, you can create your own by finely blending granulated sugar in a high-speed blender or food processor until it reaches a powdery consistency.
Heavy Cream (or Milk): For Fluffiness and Lightness
This ingredient is key to achieving that wonderfully light and fluffy consistency that makes Oreo frosting so delightful. Heavy cream (sometimes labeled whipping cream) adds richness and airiness, transforming the butter and sugar into a cloud-like texture. Begin by adding it slowly, a tablespoon at a time, until you reach your desired consistency. While heavy cream yields the creamiest results, you can substitute it with milk (whole milk works best) if necessary. Bear in mind that using milk might result in a slightly less rich and creamy frosting, so you might need to adjust the amount to get the right thickness.
Vanilla Extract: The Flavor Enhancer
A dash of good quality vanilla extract is often the unsung hero of many desserts, and Oreo frosting is no exception. It doesn't overpower the distinctive Oreo flavor but rather enhances and rounds out the overall sweetness, adding a warm, aromatic depth. Opt for pure vanilla extract for the best flavor. If you're out of vanilla, a splash of bourbon can introduce a sophisticated warmth, or a touch of maple syrup can provide a different but equally pleasant sweetness and aroma, though these will subtly alter the final flavor profile.
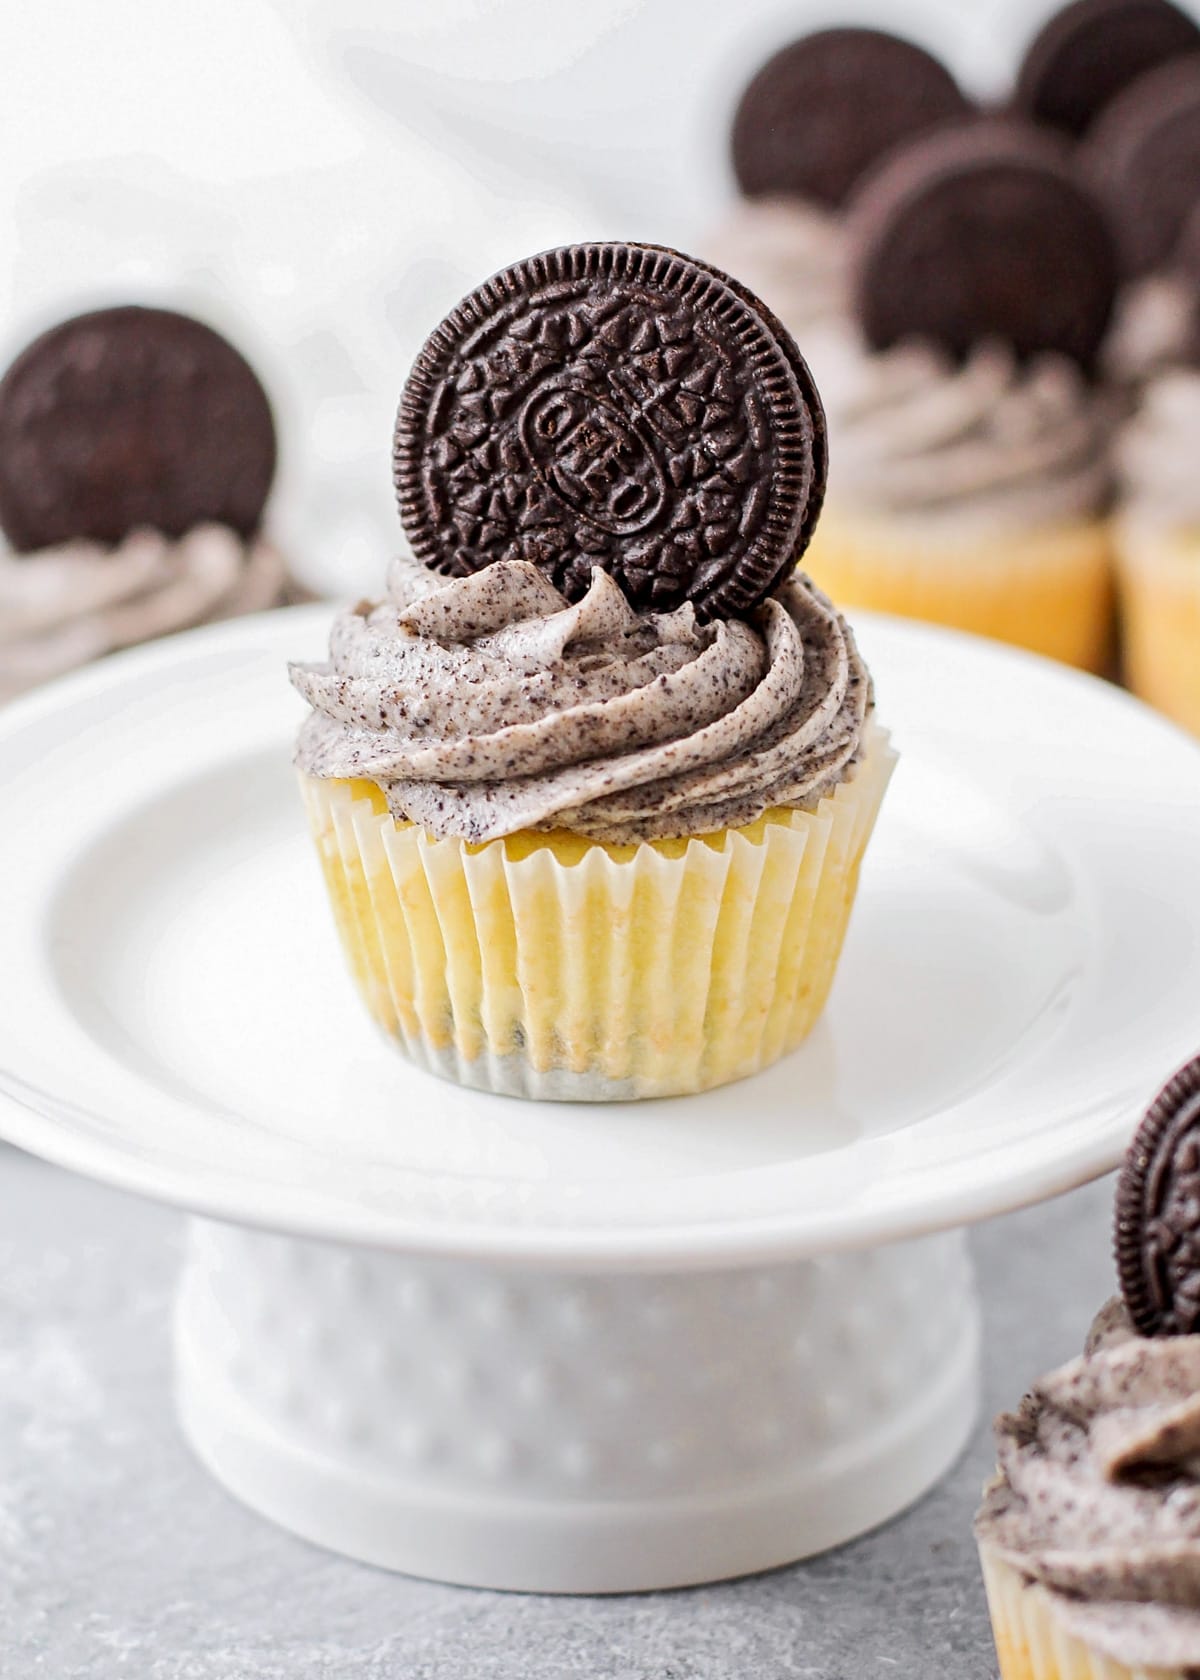
Oreo Cookies: The Star of the Show
Of course, no Oreo frosting would be complete without its namesake! The classic chocolate sandwich cookies are what give this frosting its signature look, flavor, and delightful textural crunch. When preparing your Oreos, the key is to crush them very finely. This ensures they integrate smoothly into the frosting, distributing their flavor evenly and preventing large, clumpy bits that can be difficult to pipe or spread. While classic Oreos are the standard, feel free to experiment with different Oreo flavors (mint, peanut butter, etc.) for a unique twist. If Oreos aren't available, any other chocolate sandwich cookie will work as a suitable substitute. Remember, you can adjust the quantity of crushed Oreos to achieve your preferred intensity – use less for a subtle hint, or more for a bolder, more pronounced cookie flavor.
Mastering the Technique: Essential Tips for Fluffy, Velvety Oreo Frosting
With your ingredients prepped, the next step is technique. While inherently simple, a few expert tips can elevate your Oreo frosting from good to absolutely phenomenal, ensuring a consistently fluffy and velvety result every time.
Room Temperature Butter: Non-Negotiable
We've stressed this before, but it bears repeating: start with room temperature butter. This means butter that yields slightly when pressed but isn't greasy or melted. If you forgot to take your butter out, a quick trick is to cut it into small cubes and let it sit on the counter for 15-20 minutes, or gently warm it in the microwave at very low power for short bursts (5-10 seconds) until softened, not melted.
Gradual Sugar Addition: No "Sugar Clouds"!
Adding powdered sugar can be messy if not done correctly. To avoid a plume of sugar dust coating your kitchen, always add the powdered sugar gradually, one cup at a time, to the butter. Start your mixer on the lowest speed until the sugar is just incorporated, then increase the speed to beat it thoroughly. This prevents a "sugar cloud" and ensures all the sugar is properly blended.
Crushing Oreos to Perfection
For the smoothest Oreo frosting, your cookies need to be finely crushed. The most efficient way to achieve this is by using a food processor. Pulse the cookies until they resemble fine crumbs, almost like coarse sand. If you don't have a food processor, place the cookies in a sturdy Ziploc bag, seal it, and use a rolling pin to crush them thoroughly. The finer the crumbs, the smoother your frosting will be, allowing for easier piping and a more elegant finish.
The Power of the Mixer
While you *can* mix Oreo frosting by hand, a stand mixer or a hand mixer will yield far superior results. The aeration provided by a mixer is what transforms the ingredients into that light, fluffy, and voluminous texture. Beat the butter alone first until light and creamy, then gradually add the sugar and liquid. Don't be shy about letting it mix for several minutes on medium-high speed once all ingredients are added, scraping down the sides of the bowl frequently. This incorporates air and ensures everything is evenly combined and silky smooth.
Achieving the Ideal Consistency
The beauty of homemade frosting is its adjustability. If your Oreo frosting seems too thick for your intended use (e.g., piping intricate designs), simply add a tiny bit more heavy cream, a teaspoon at a time, until it loosens up. Conversely, if it appears too thin or runny, gradually beat in more powdered sugar, a tablespoon at a time, until it reaches your desired stiffness. Always adjust slowly to avoid over-correcting.
Allergy-Friendly and Dietary Adaptations
One of the wonderful aspects of modern baking is the ability to adapt recipes to suit various dietary needs. For those with gluten sensitivities, many brands now offer gluten-free chocolate sandwich cookies that can be used in place of traditional Oreos. If dairy is an issue, look for high-quality plant-based butter alternatives and dairy-free heavy cream substitutes (like full-fat coconut cream or specific plant-based whipping creams). These substitutions allow almost everyone to Whip Up Fluffy Oreo Frosting: Easy 4-Ingredient Recipe, ensuring that this irresistible treat can be enjoyed by all.
Storage, Shelf Life, and Serving Suggestions
Once you've perfected your batch of Oreo frosting, you'll want to ensure it's stored correctly to maintain its freshness and flavor. Any leftover frosting should be transferred to an airtight container and refrigerated for up to one week. When you're ready to use it again, simply let the frosting come to room temperature on the counter for about an hour, then give it a good stir or a quick whip with your mixer to restore its creamy, spreadable consistency.
The versatility of Oreo frosting is truly one of its greatest assets. While it's utterly divine spooned straight from the bowl, here are some popular and creative serving suggestions:
- Cakes and Cupcakes: This is arguably its most classic pairing. It's magnificent on chocolate, vanilla, red velvet, or even funfetti cakes and cupcakes. Its creamy texture and delightful crunch make it perfect for piping elaborate designs or simply spreading generously. For more inspiration, check out our guide on Decadent Oreo Buttercream: Elevate Your Cakes & Cupcakes.
- Brownies: A thick layer of Oreo frosting on a rich, fudgy brownie is a match made in dessert heaven.
- Cookie Sandwiches: Use it to sandwich two soft sugar cookies or even more chocolate cookies for an ultimate cookie experience.
- Dessert Spreads: Serve it as a dip for fruit slices (strawberries, bananas), pretzels, or graham crackers.
- Fillings: Use it as a filling for tarts, choux pastry, or even crepes.
- Milkshakes: Swirl a dollop into a vanilla or chocolate milkshake for an extra boost of Oreo goodness.
Conclusion
Creating your own Oreo frosting is a simple yet incredibly rewarding endeavor. By understanding the role of each ingredient and applying a few key techniques, you can consistently achieve a fluffy, creamy, and irresistibly delicious frosting that will impress everyone. From humble cookies to grand celebratory cakes, this versatile treat brings a touch of nostalgic joy and decadent flavor to any dessert. So, gather your ingredients, fire up your mixer, and prepare to master the art of perfect Oreo frosting – your taste buds (and your guests) will thank you!
